Mantas: Third Steps
Working on the third and, I hope, final firing. This firing is mostly adding black outlines, but I also do some more intensifying colors, like I’ve done on the yellow-brown coral that has the outlines on it. I’ll do that on the other one too. Most china painters don’t do this outlining, but I work much larger than traditional china painters, and these images need to carry across a room, so they need to be punchy. Also, doing several coats and pouncing the colors to remove brush marks, the edges of things get fuzzy. This gets them crisp again. I keep the black in the mortar and pestle and grind it periodically to keep it in suspension. I just let it dry out in between jobs.
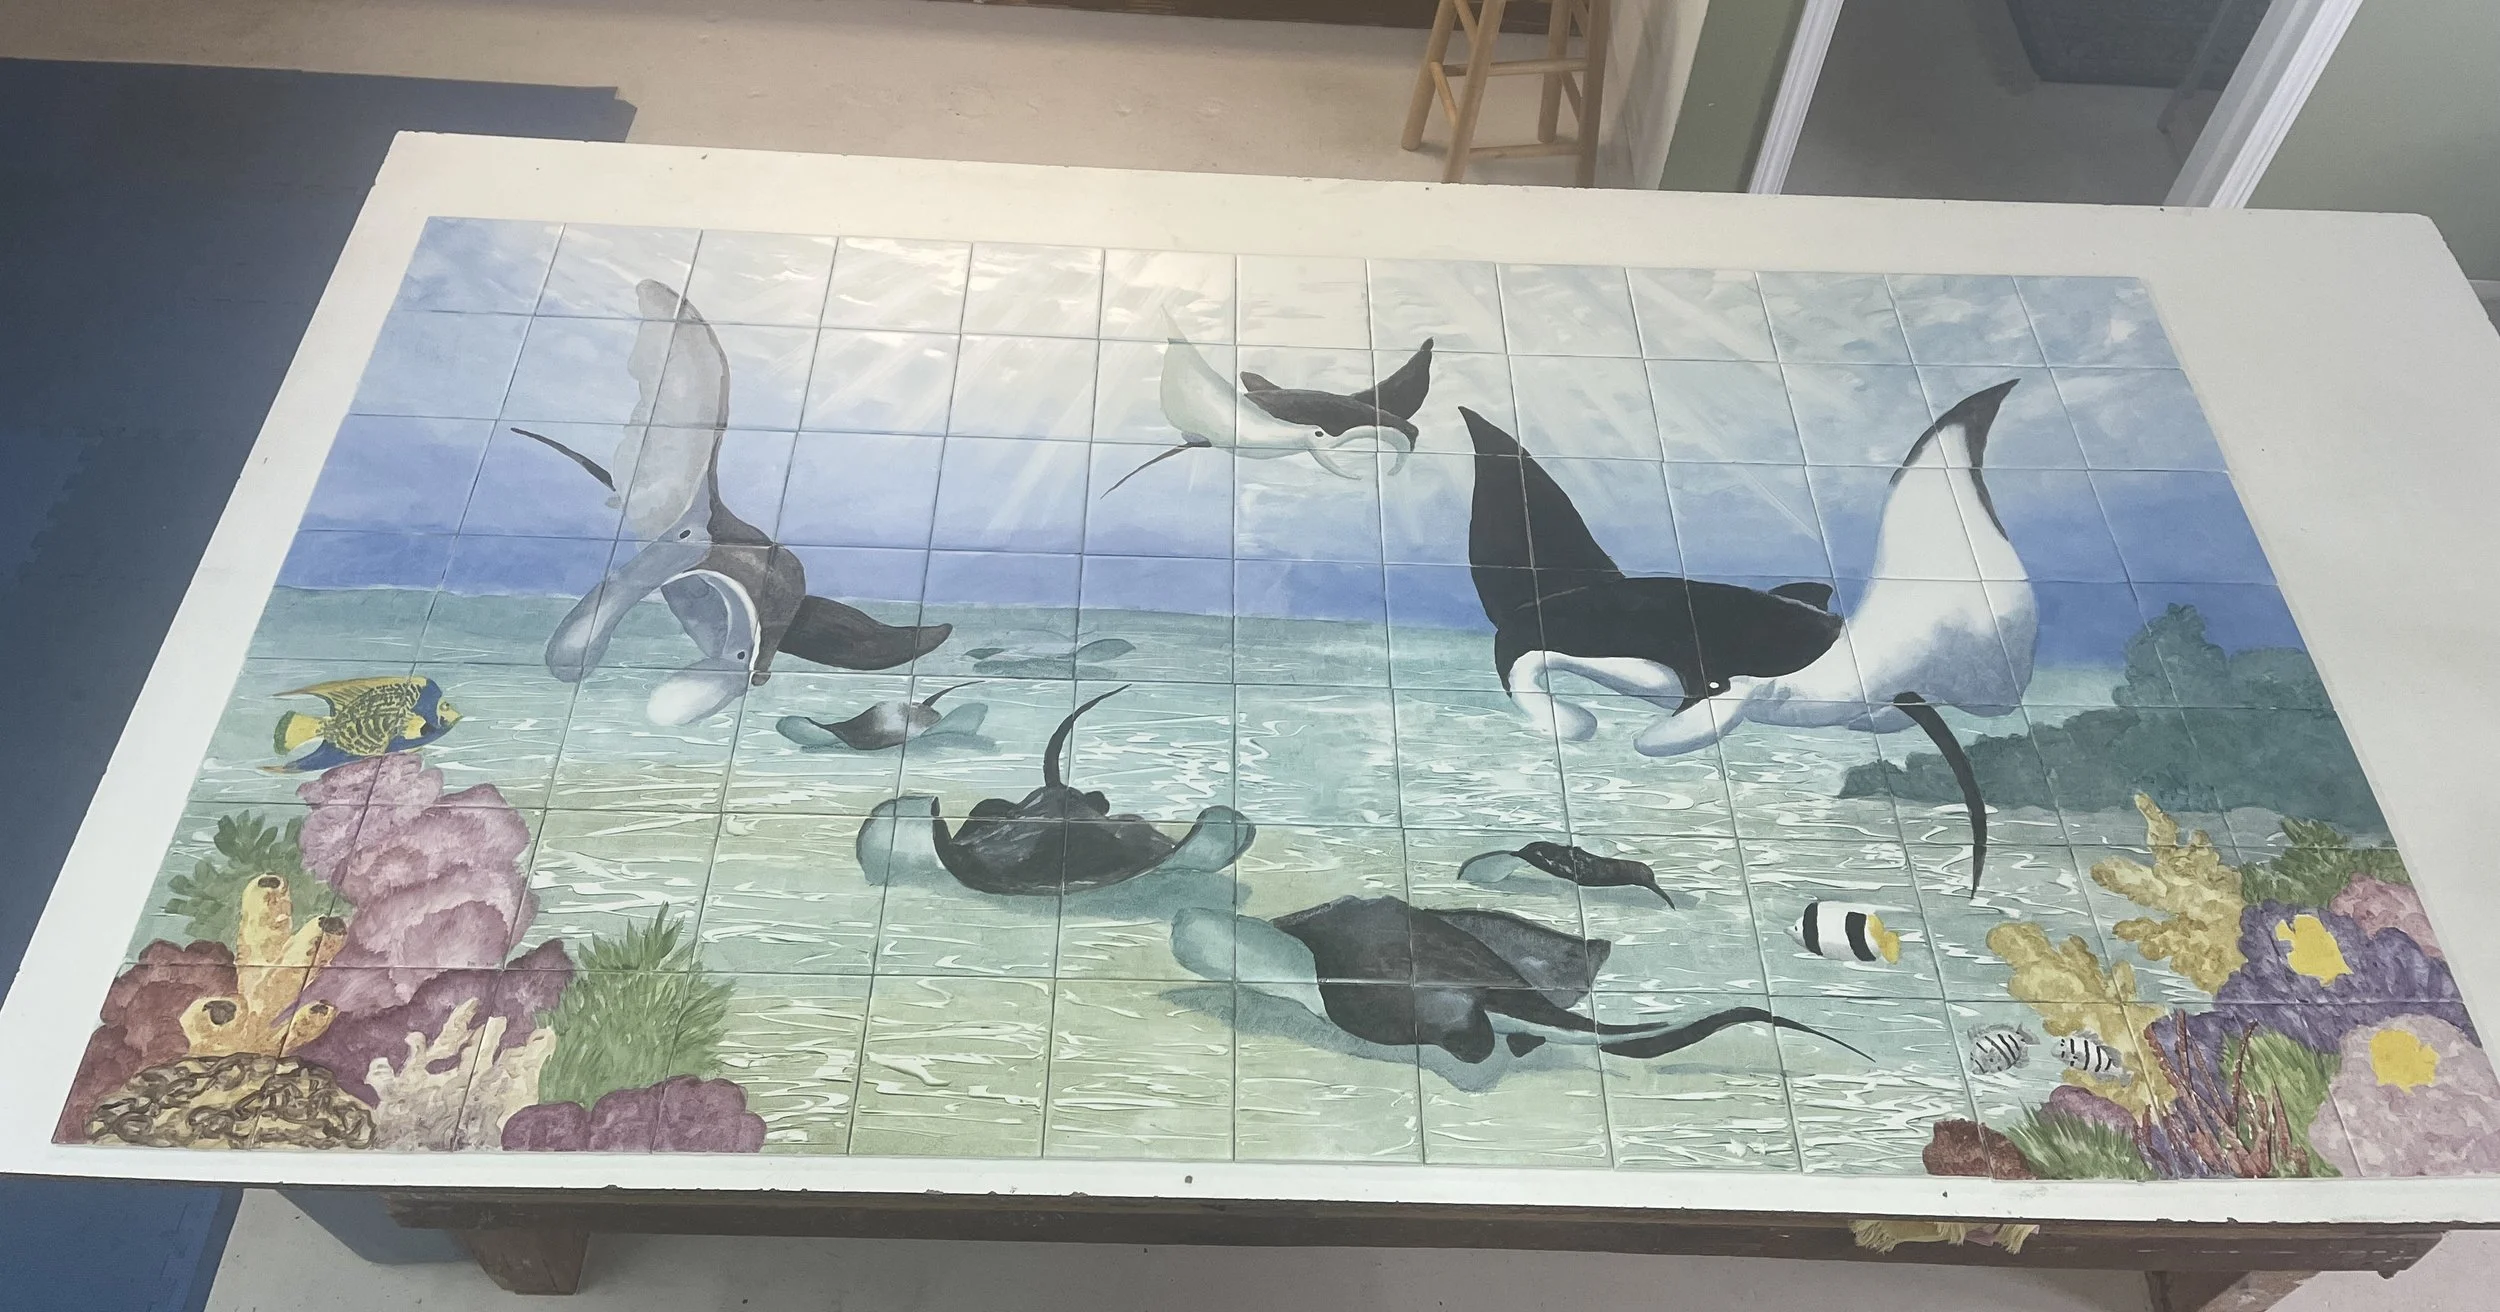
Mantas Second Firing
Here’s what the Mantas bespoke tile mural looks like after the second firing. You can see that the background is now filled in, the colors have been deepened and texture has been added. There will be at least one more firing. The next one will be black outlines, and deepening colors even more. I’m liking it so far. I particularly like the way the sunlight beams through the water and plays on the sand.
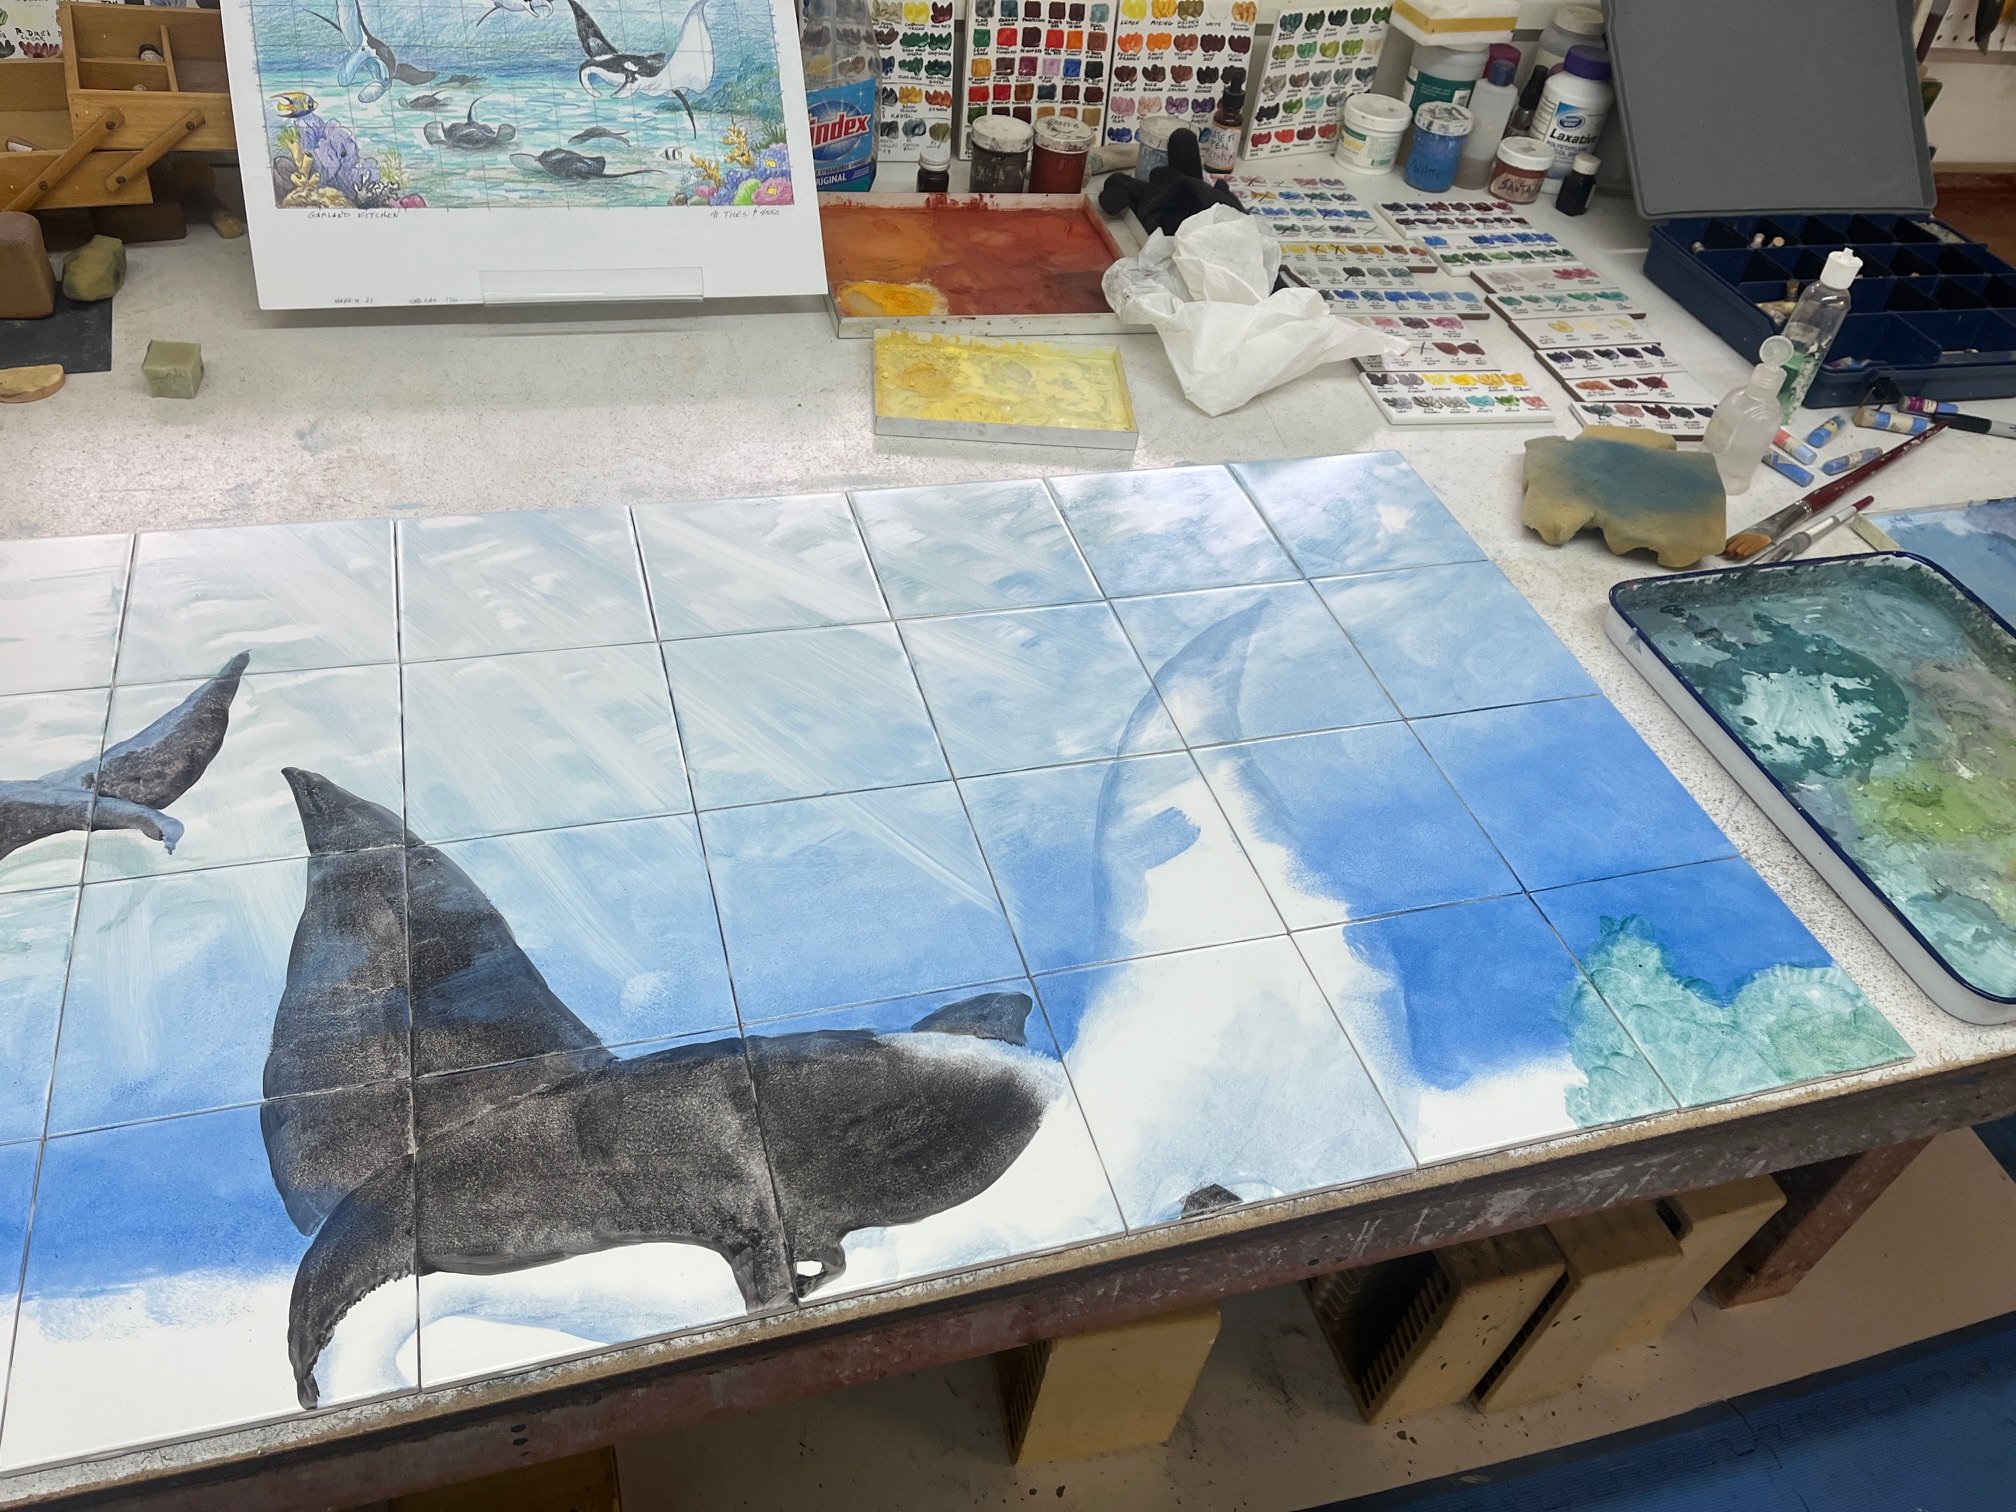
Mantas Tile Mural: Second Steps
Working my way through the second firing. This is when the real painting happens. First thing to do is paint in the background water and sand. You can see on the big manta ray how I just paint right over the imagery and wipe it off later. I like a closed medium for this. I want it to dry but take a while and not dry too hard. You can see on the other photo where I’ve deepens the colors on the rays and their shadows and the fish, but I haven’r started on the coral yet. I’m wiping out the patterns of the light on the sand with the same rubber tool I used before.
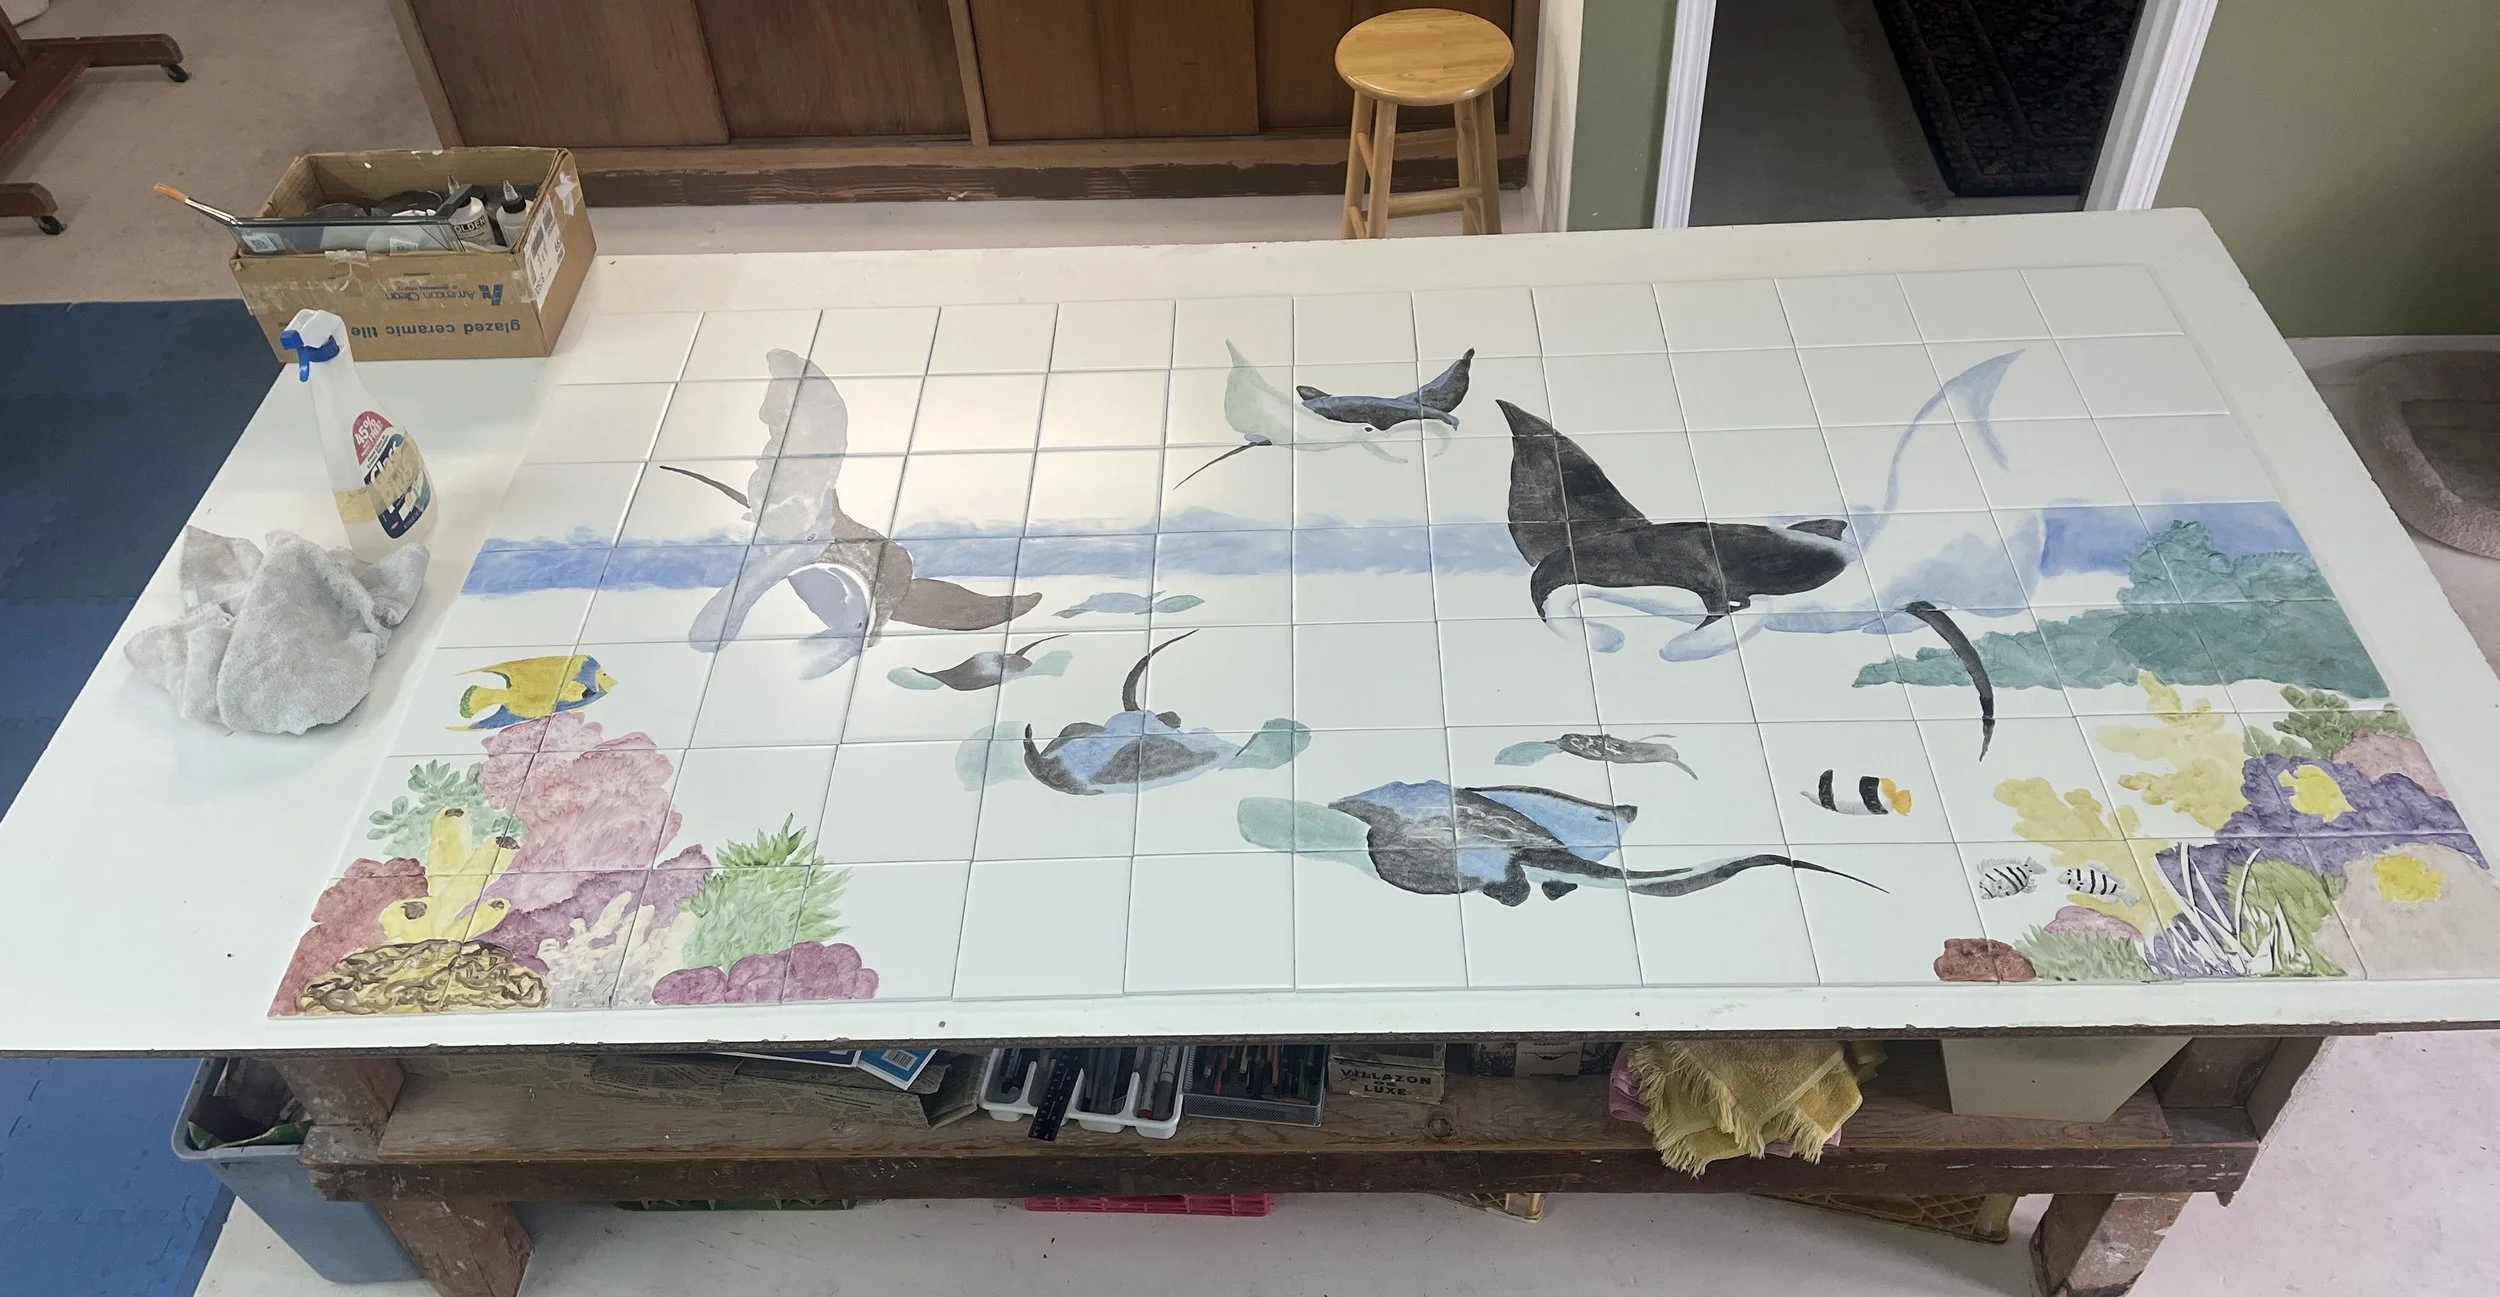
Mantas: First Firing
This is what the Mantas custom tile mural looks like after the first firing to cone 018. I like to establish where all the images are going to be first and paint the backgrounds in later firings. There will be at least two more firings on this kitchen backsplash tile mural. I do a lot of things in completely different ways than traditional china painters, notably using only water based mediums. If you’d like to learn how I do things, you can sign up for my online china painting course from TeachinArt, at https://www.teachinart.com/china-painting.html.
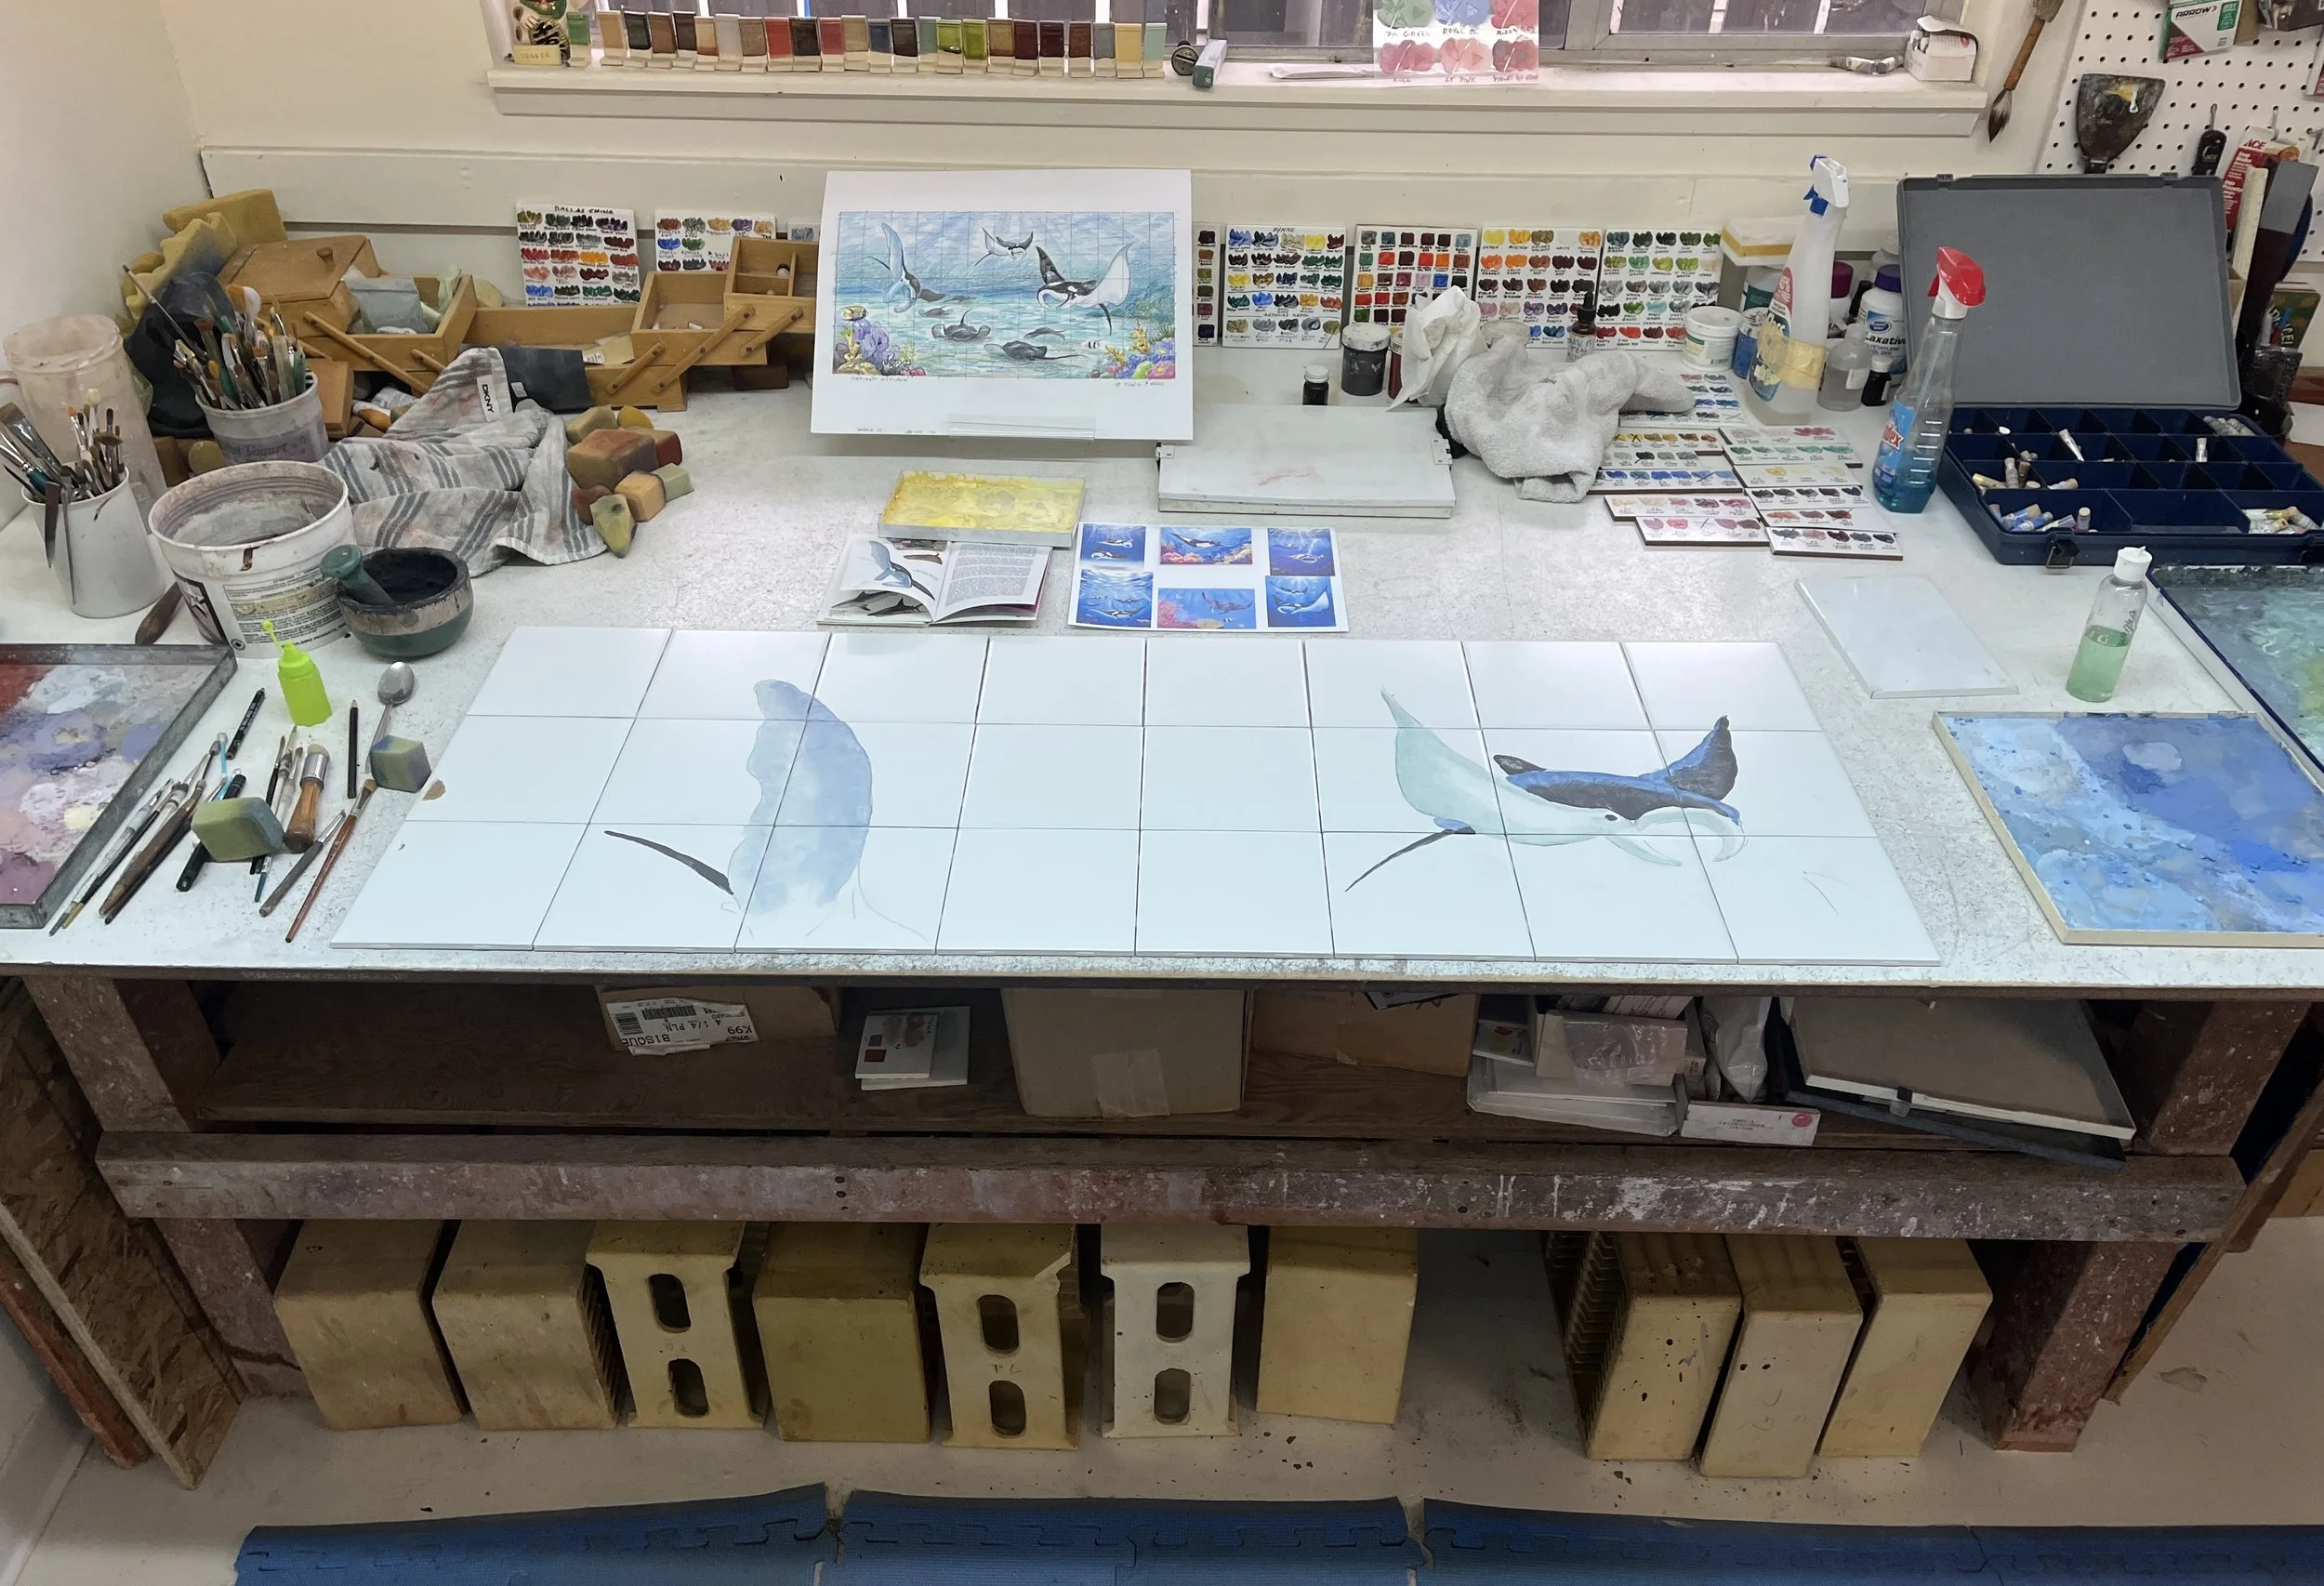
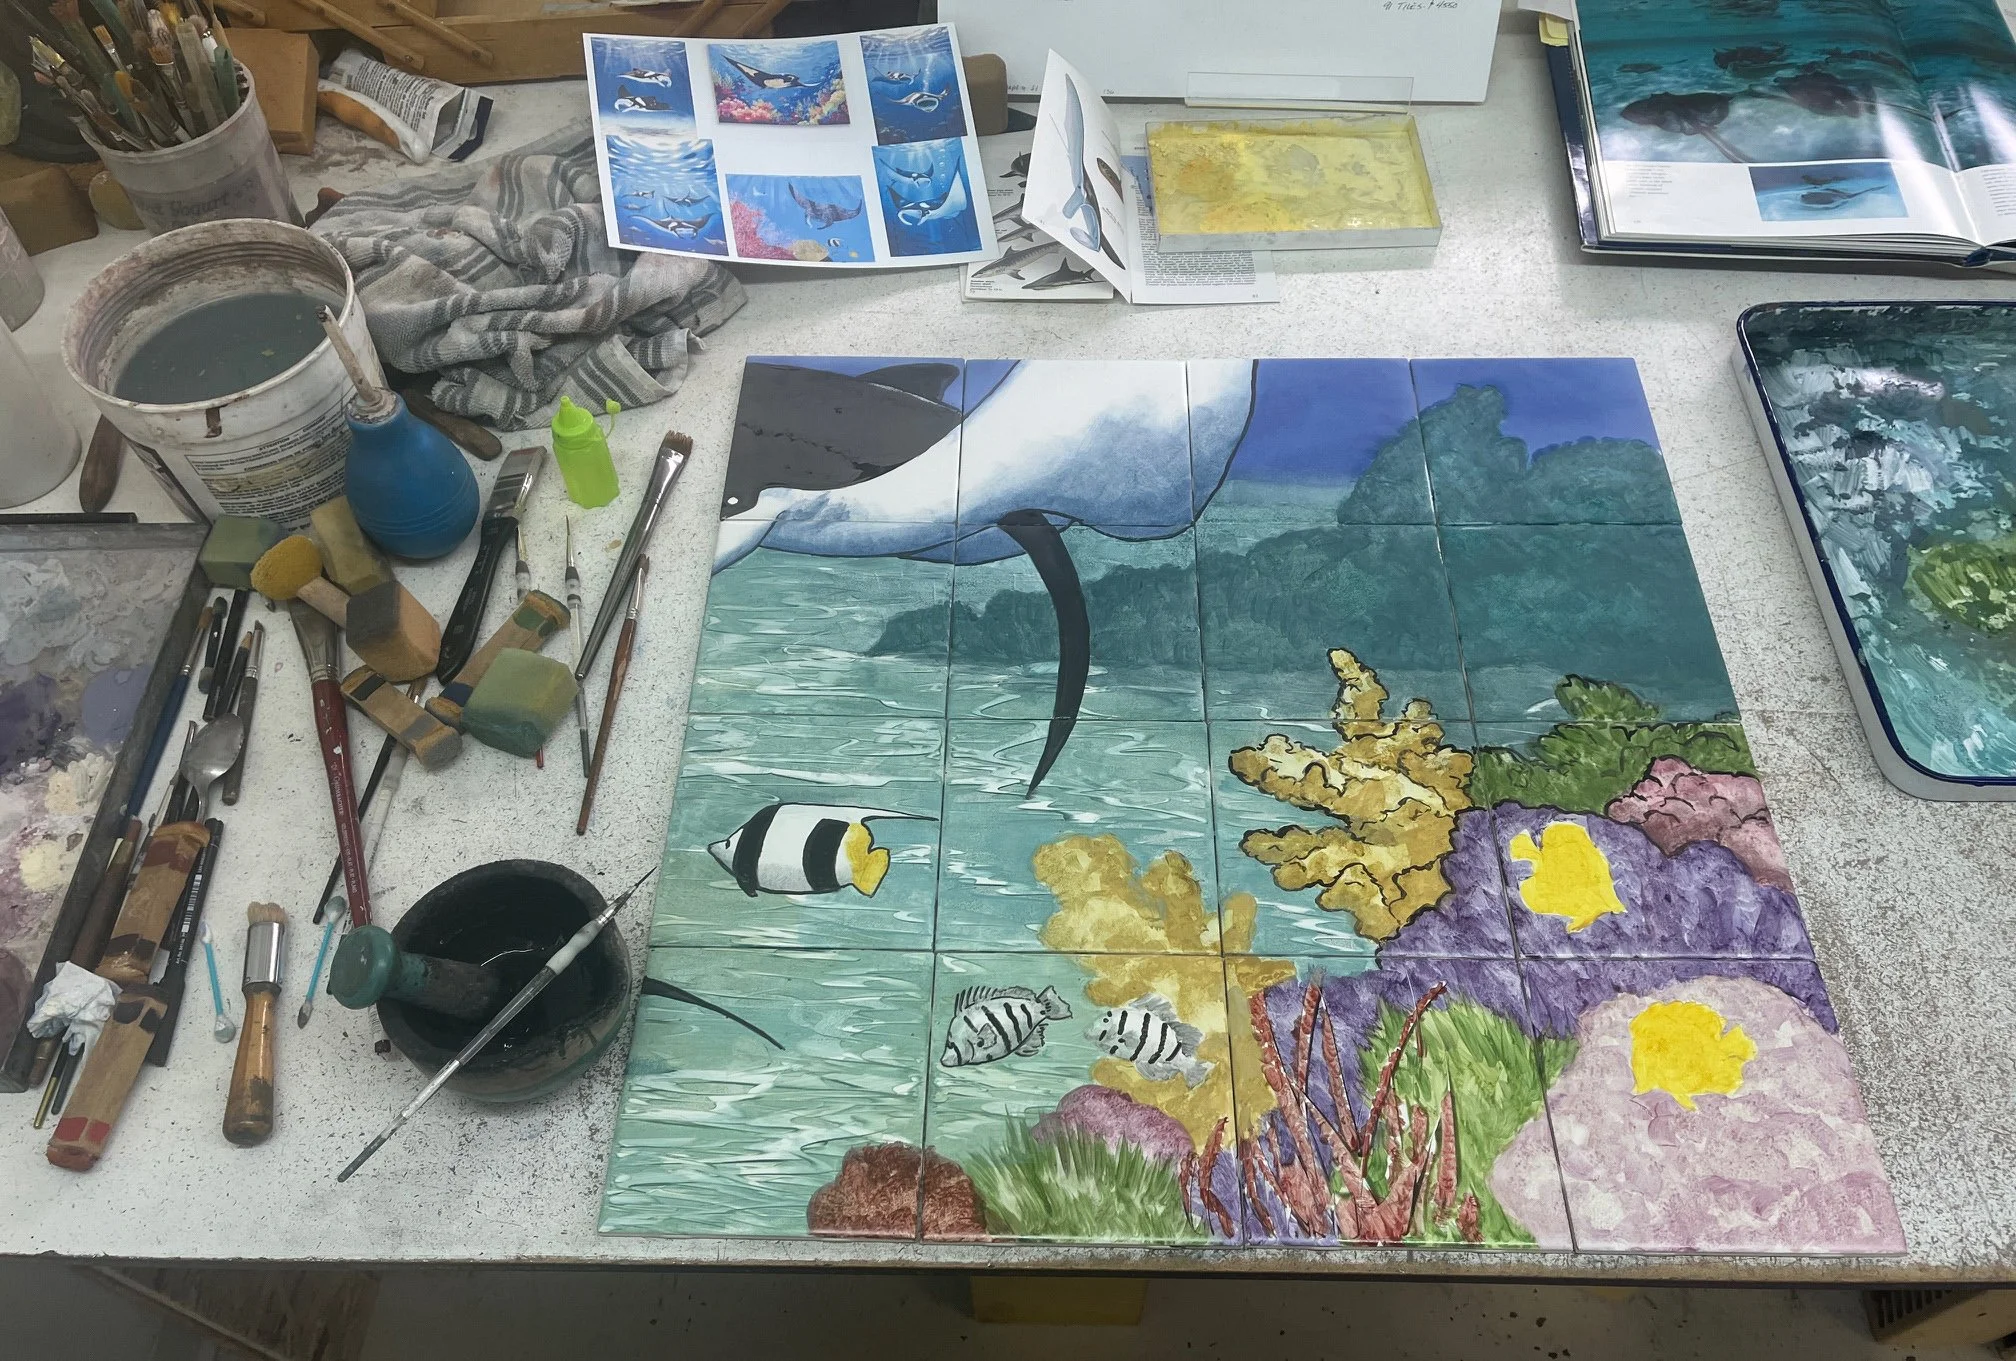
Manta Bespoke Tile Mural: First Steps
This is hoe I start on a custom tile mural. I’ve got my proposal drawing togo by, my source material laid out, the tiles have been numbered on the backs. I usually start in the upper left and work my way to the bottom right. There will be a water background, but I like to get the images established and do the backgrounds later.
In the second picture you see the lower right corner almost done. I just have the two fish and on coral to do yet and it will be ready to go into the kiln. The white strokes that look like grasses just to the left of the blank area were wiped out with that rubber too you see laying next to the tile.
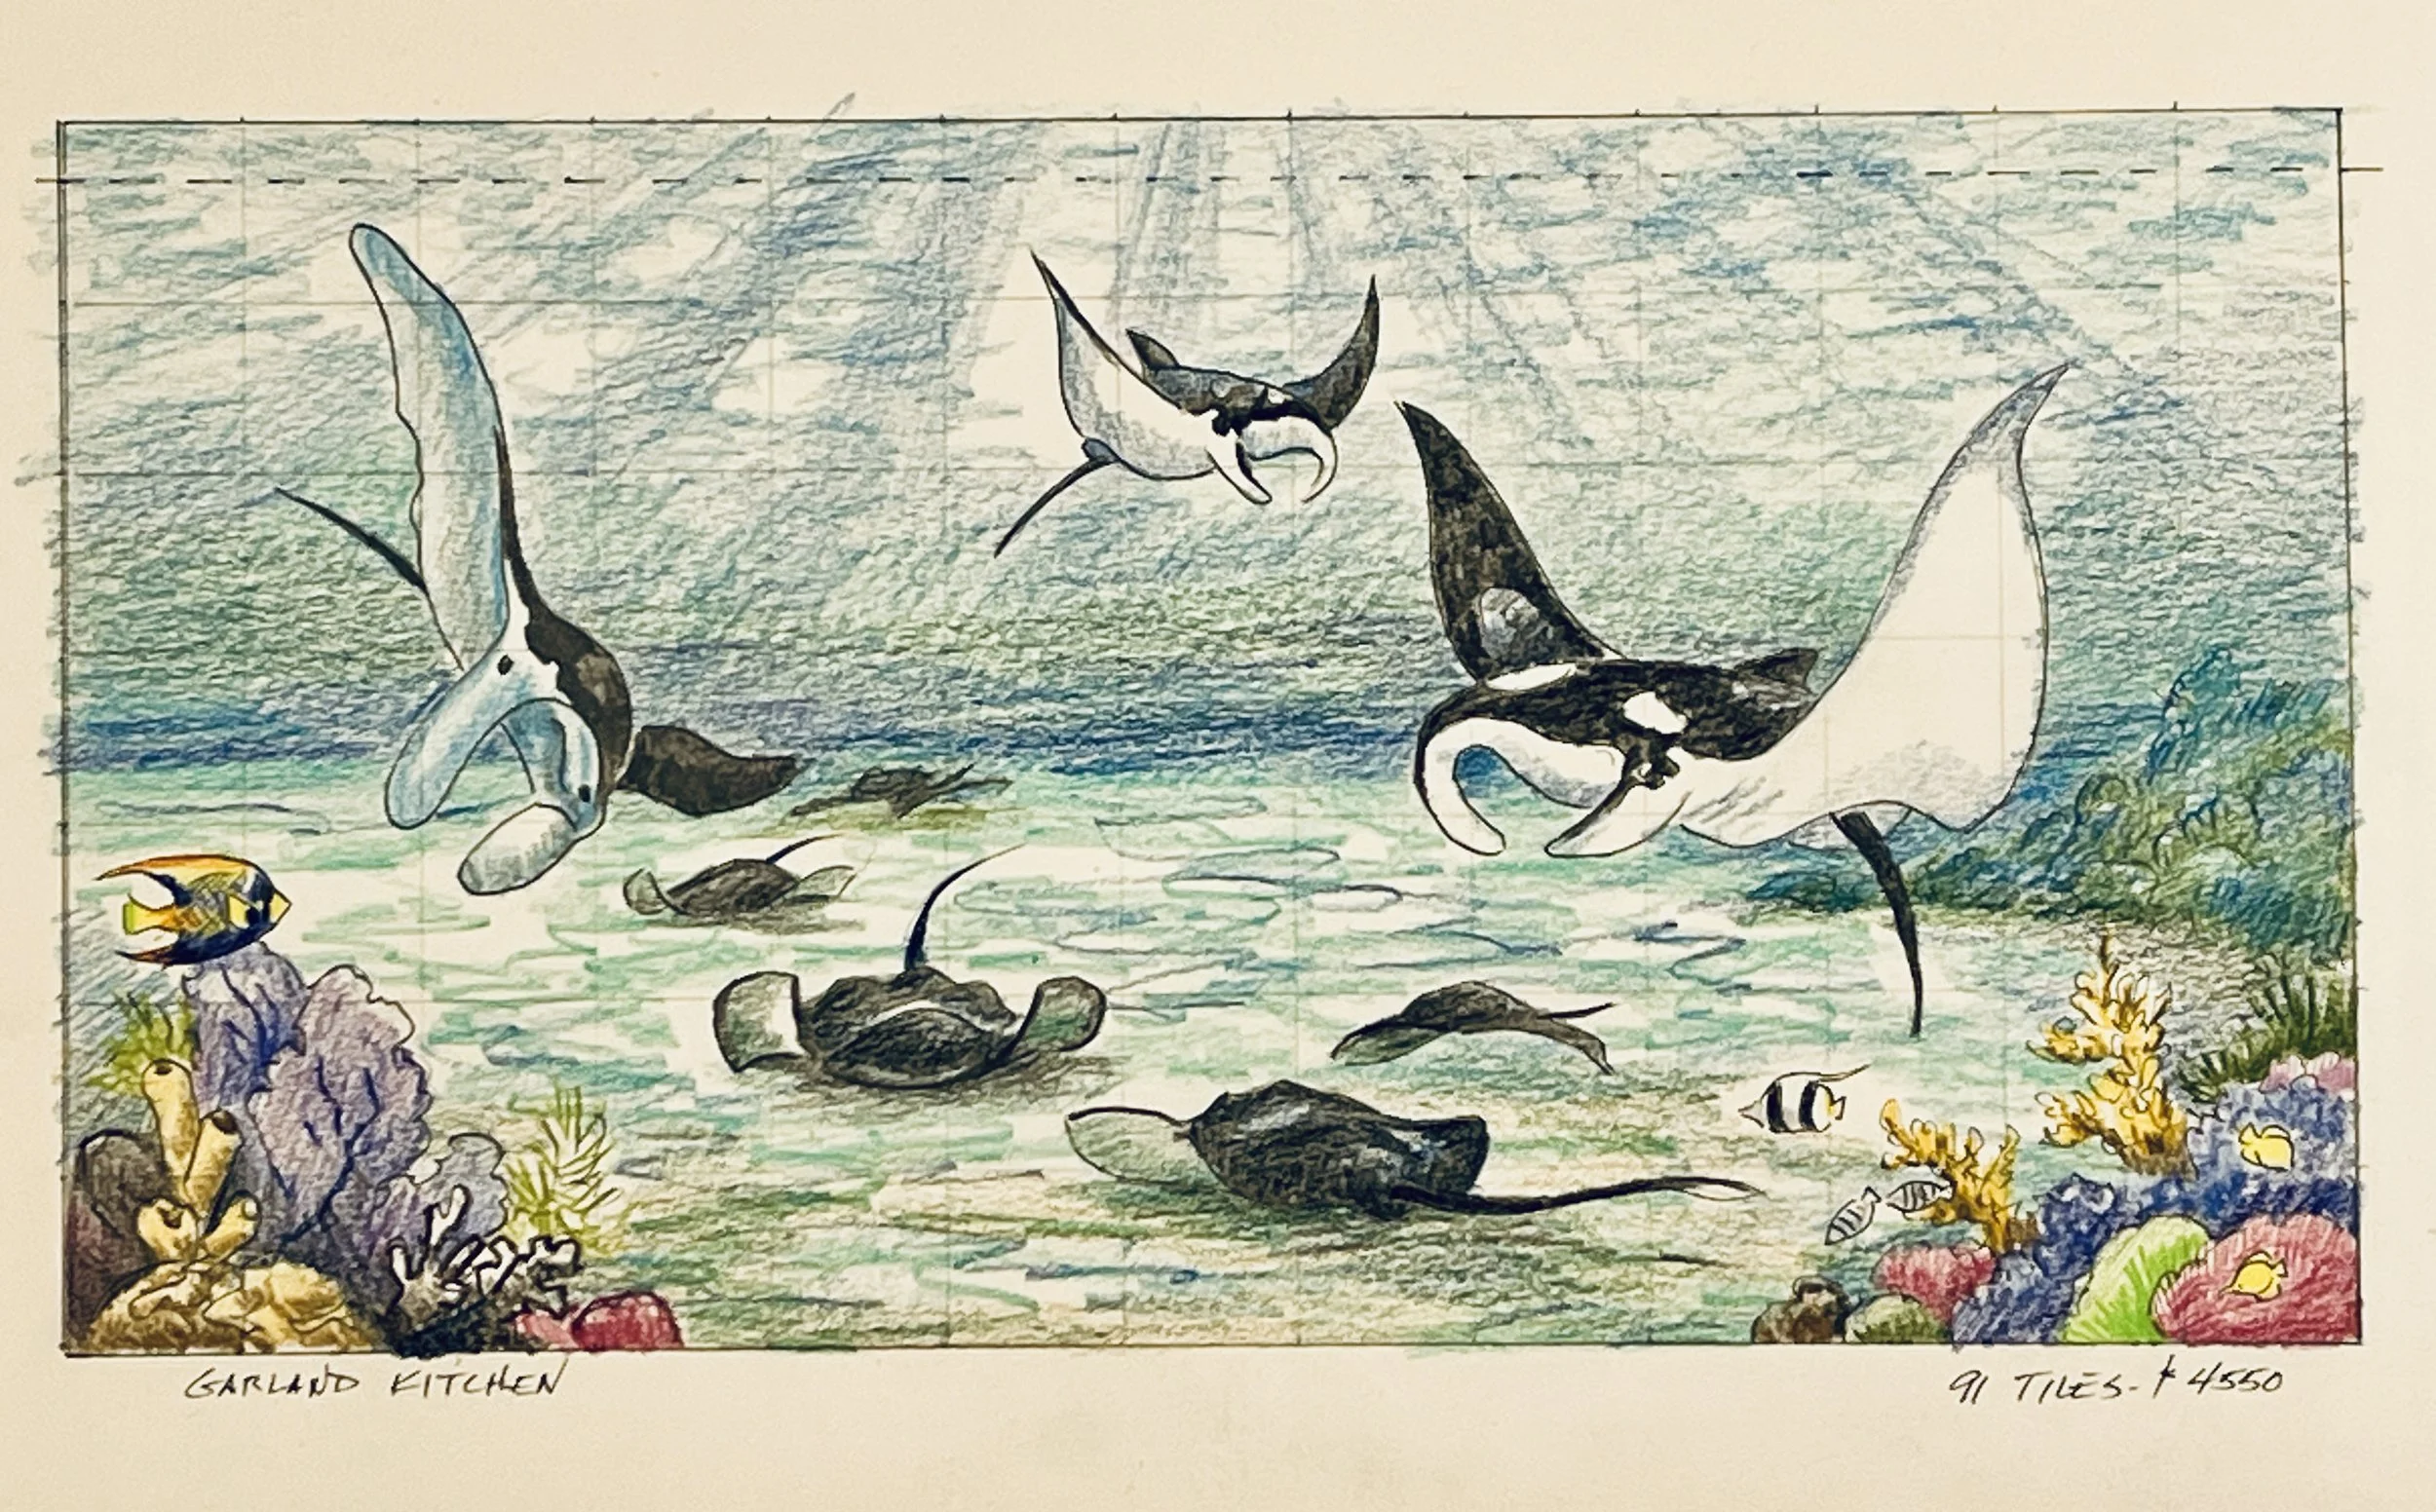
Starting the Mantas Mural
I’m getting ready to start a new custom tile mural. This one is going to Florida and depicts manta rays. It will go over a countertop in a kitchen. These are 6” tiles, so the mural will be 6’ 6” wide and 3’ 6” high. This is the drawing for it. Some of the images were supplied by the clients and some were from my extensive collection of books and clippings.
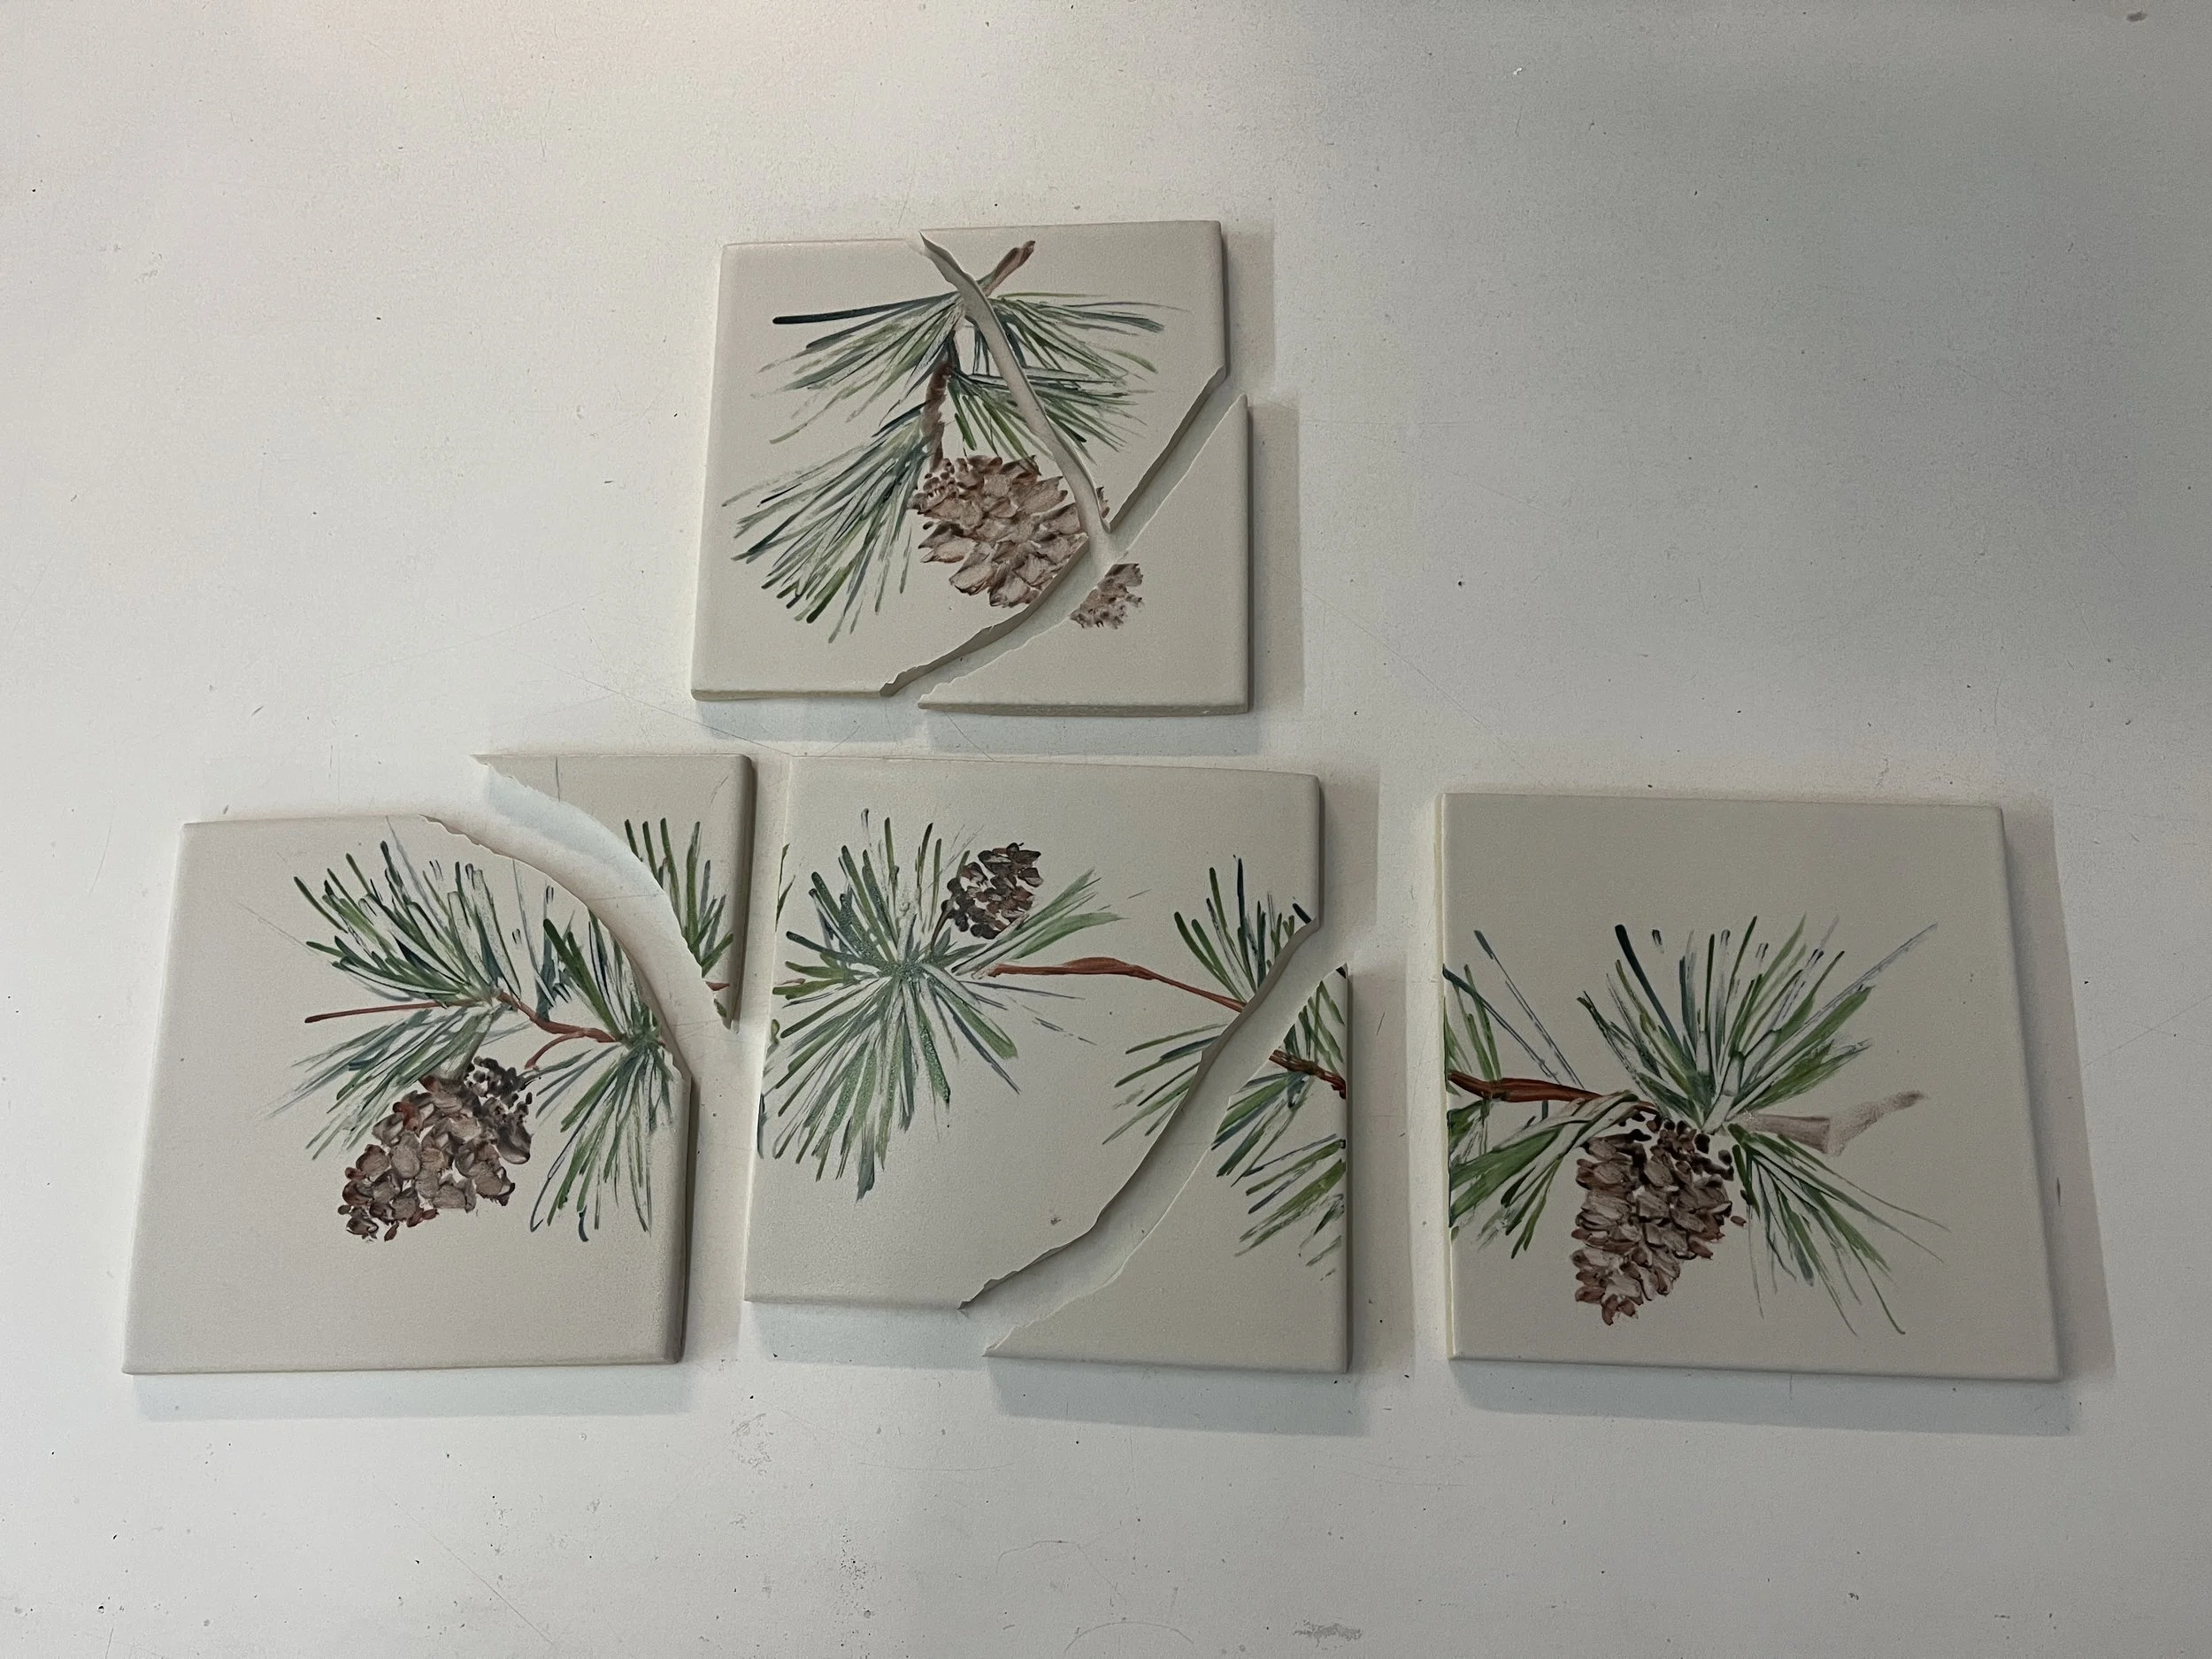
Oops!
Sometimes the magic works, and sometimes it doesn’t. In 40 years or so of making custom tile murals, I have found very few brands of tile that I couldn’t work on. But some will just not stand up to refiring. They’re almost always, like these samples for a bathroom vanity tile mural, made by hand either by an individual or in a small factory. They were made from wet clay on a slab roller, not dust pressed like commercial tile. This puts different stresses on the fired tile. They’re perfectly fine and durable as is, but they won’t survive the china paint firing. So now we’re looking for a different tile for this job.